The vegetable garden notebook / Techniques
Seedling propagator: managing the cover and seedling emergence
The cover helps retain moisture during germination. Its use then requires monitoring seedling emergence, temperature and the condition of the growing medium: a closed propagator does not meet all seedling needs.
Adapt this guidance to your garden’s climate and conditions.
Practical steps
- Prepare
Check the crop’s requirements and the drainage of containers.
- Monitor
Check warmth, growing-medium moisture and the appearance of shoots.
- Uncover
For indoor seedlings described here, remove the cover when seedlings emerge.
- Support
Place seedlings in a bright spot and adjust watering without waterlogging the growing medium.
What is a seedling propagator for?
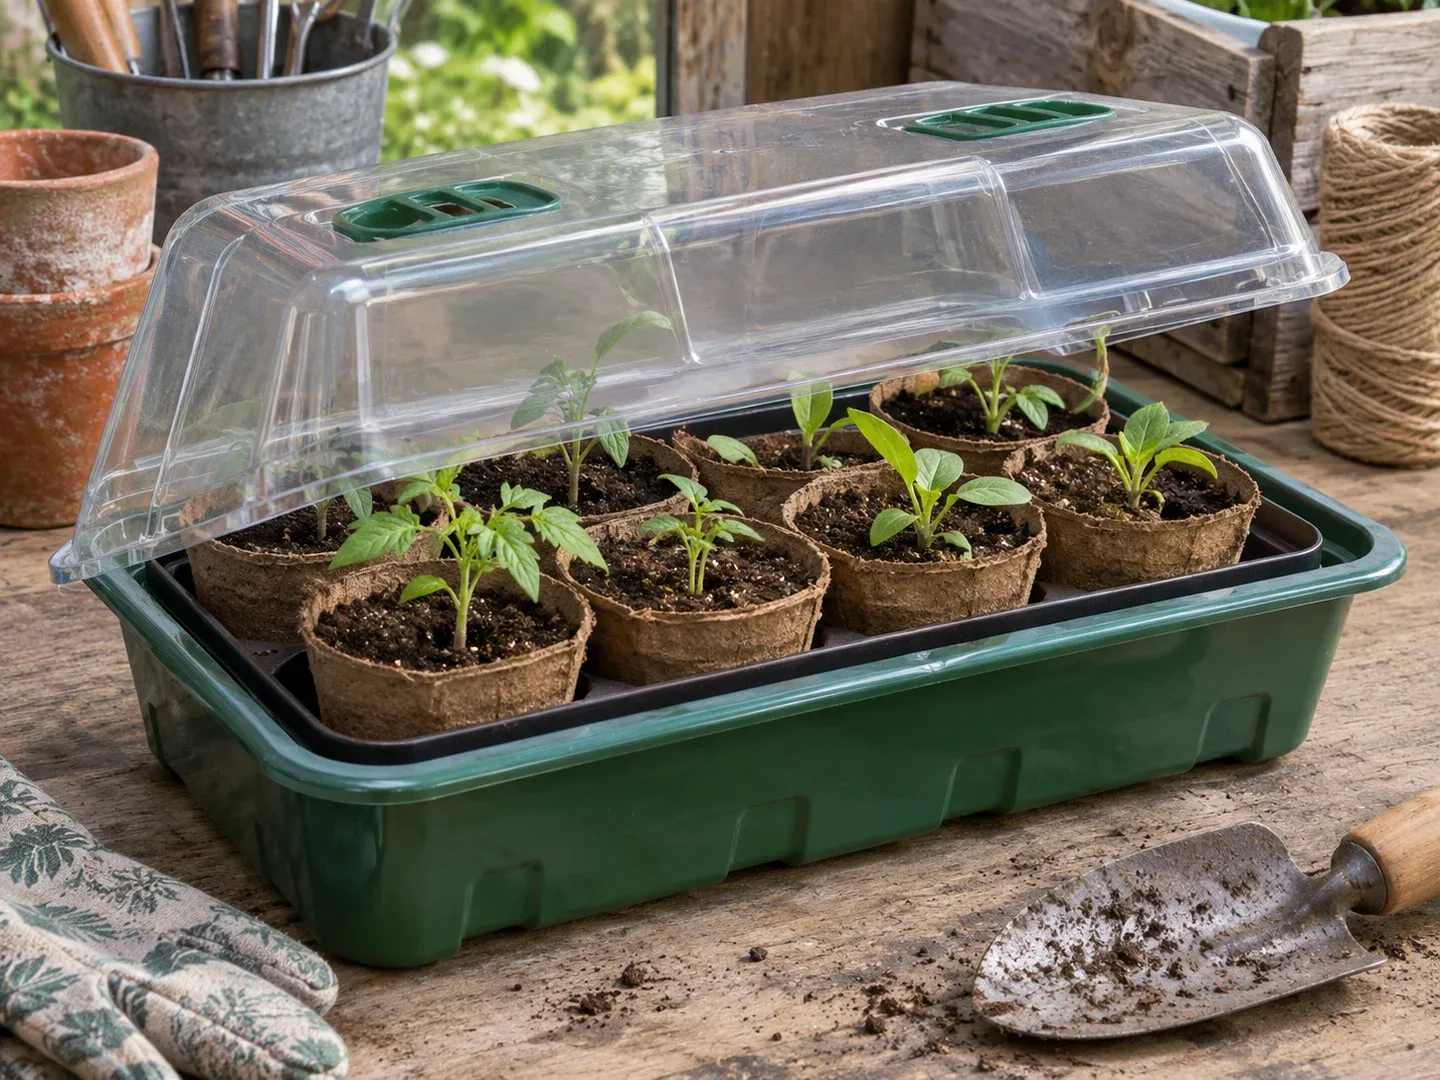
This guide focuses primarily on the tabletop propagator: a seed tray or small pots under a transparent cover. This limits moisture loss and creates a slightly warmer atmosphere, according to the RHS. It can support germination, but temperature and light requirements remain those of the sown crop.
A shelved outdoor mini-greenhouse is a different piece of equipment: it houses pots and young plants, with conditions varying significantly depending on the weather and whether it is open. The RHS notes that these small volumes buffer temperature fluctuations less effectively than a large greenhouse. The cover management described below applies to the propagator; the limitations of outdoor shelters are detailed at the end of the page.
Prepare the tray before closing the cover
Check the instructions for the species and variety: sowing in containers or in situ, germination temperature and any light requirement. The general sowing guide helps choose the starting method; the propagator does not make indoor sowing necessary for every vegetable.
Use clean, well-draining pots or cells. If the bottom tray is watertight, it collects drained water: this is not the container in which to keep roots submerged. Moisten the substrate before sowing, without waterlogging it, then sow as per the packet. The cover should remain above the substrate without touching it. These precautions are described by the University of Maryland.
To simplify subsequent steps, keep batches identifiable and, if possible, separable. You can remove pots whose seedlings have already emerged without imposing the same conditions on seeds still germinating. The sowing record sheet lets you record these differences.
Monitor heat, water and light separately
Heat: Do not assume the temperature of the seedlings matches that of the room. A location near a window can be cold at night and very hot during the day; the University of Minnesota also highlights drying caused by excessive heat. Check the location, especially when it receives sunlight. A thermometer helps compare observed conditions with the crop’s requirements. If the propagator overheats, ventilate and change its location if necessary; the opening should allow temperature reduction. RHS
Water: Observe the substrate, not just the appearance of the cover. Misting may moisten the surface while leaving the rest of the container dry. After watering, drain any water accumulated in the tray, as recommended by the University of Minnesota. No fixed watering schedule replaces this monitoring.
Light: Check the seeds’ requirements before emergence. Once shoots emerge, provide a sufficiently bright location; the section on light after emergence specifies this placement. Stems that elongate and become thin may indicate insufficient light; keeping seedlings warmer under the cover does not correct this deficiency. University of Minnesota
When should you remove the cover after emergence?
For common vegetable seedlings grown indoors, the RHS and the University of Maryland recommend removing the cover as soon as seedlings appear. The signal is therefore seedling emergence, not a predetermined number of days.
If seedlings in the batches do not emerge at the same time, remove the relevant pots when separation is possible. Place them in light and continue monitoring moisture: the substrate should neither dry out completely nor remain saturated. Any documented specific instructions for your species take precedence over this general guidance.
Reducing the risk of damping off
A very humid atmosphere, poor air circulation and overcrowded seedlings encourage damping off. This disease can cause seedlings to wilt shortly after emergence; it is not merely the presence of condensation. RHS
To reduce the risk, clean equipment before use, avoid sowing too densely, do not overwater and keep young plants well ventilated. Removing the cover when seedlings emerge is part of this practice. However, a collapsing seedling warrants examination: this single sign is insufficient to identify the cause.
Does an outdoor mini-greenhouse protect against frost?
Do not assume a small unheated shelter is frost-proof. The RHS limits the protection of cold frames and mini-greenhouses to light frosts. Check forecasts and your young plants’ requirements; if conditions become too cold for them, provide a suitable location rather than relying solely on closing the cover.
Also keep the opening accessible for ventilation and check the light received at each level: shelves may shade plants below. Moving to an outdoor mini-greenhouse does not, in itself, mean that tomato seedlings are ready to stay outside.
What light should be provided after emergence?
A transparent cover does not generate light. Prepare a bright spot for seedlings and ensure shelves or other pots do not shade them. If you need to add a lamp, adjust its distance based on the equipment used rather than relying on a universal height. Find verified guidelines, including the lighting duration proposed by Maryland, in the indoor seedling light section.
Should you choose a greenhouse, a tunnel or open ground?
Choose based on your objective and the monitoring possible:
| Situation | Options to consider | Point to check |
|---|---|---|
| Sow a crop suited to the season in workable soil | Direct sowing outdoors | Conditions for emergence, water and local risks |
| Start a few plants in containers | Propagator then bright location | Remove the cover when seedlings emerge and harden off before moving outside |
| Start certain crops earlier or extend their growing season | Greenhouse or tunnel | Ventilation, shading if necessary and water monitoring |
The RHS explains that the protected environment of a greenhouse or tunnel can extend the season; it does not guarantee a fixed number of weeks gained for all vegetables. Plants intended for outdoor planting must be acclimatised. RHS, vegetable sowing
During sunny periods, glass greenhouses and plastic tunnels can overheat. Monitor temperature, open vents and adjust shading to limit heat without unnecessarily depriving crops of light. Monitoring constraints influence equipment choice. RHS, ventilation and shading · RHS, small shelters
Sources and references
- How to sow seeds indoorsRoyal Horticultural Society (RHS), in English Accessed on 16 October 2026.
- Starting Vegetable Seeds IndoorsUniversity of Maryland Extension, Jon Traunfeld, in English Accessed on 16 October 2026.
- Starting seeds indoorsUniversity of Minnesota Extension, in English Accessed on 16 October 2026.
- Damping offRoyal Horticultural Society (RHS), in English Accessed on 16 October 2026.
- Coldframes and mini-greenhousesRoyal Horticultural Society (RHS), in English Accessed on 16 October 2026.
- Vegetable seeds: sowingRoyal Horticultural Society, in English Accessed on 17 October 2026.
- Greenhouse: ventilation and shadingRoyal Horticultural Society, in English Accessed on 17 October 2026.