The vegetable garden notebook / Techniques
Permaculture in the Vegetable Garden: Observe, Design, and Start Small
To begin with permaculture, start with what you want to harvest and what your garden allows. Observe, sketch a simple layout, then test it on a small area before expanding.
Adapt this guidance to your garden’s climate and conditions.
Practical steps
- Observe
Identify light, water, soil, and access before choosing a layout.
- Define
Align your harvest goals with the time and resources available.
- Organise
Sketch the crops and pathways, then select the techniques to use.
- Trial and Adjust
Start with a limited area and record results as well as the work required.
Permaculture is a design approach
Permaculture helps organise a space and its uses by considering the relationships between people, resources, and living systems. As described by David Holmgren, it combines a design process with ethical principles: care for the Earth, care for people, and limit consumption by sharing surpluses.
In the vegetable garden, this means planning the location, crops, access routes, and maintenance together. A mound, square bed, or mulch is a possible method, but its presence alone does not define the approach. Begin with a concrete need, such as harvesting a few favourite vegetables with maintenance time that fits into your daily routine.
Observe the plot before transforming it
On a sketch, identify sunny and shaded areas, existing pathways, the water source, and zones where water lingers after rain. Revisit at different times of day and continue these observations across the seasons.
The site selection must allow vegetables to receive appropriate light, grow in well-drained soil, and remain accessible for maintenance. The University of Maryland also emphasises proximity to water and pathways providing access to all parts of the vegetable garden. A space that appears free on a plan is not necessarily the best location for cultivation.
You can start a small trial while continuing to observe the rest of the garden. Avoid deciding immediately on all permanent features.
Align harvest goals with available resources
Write two short lists: what you wish to achieve and what you can dedicate to it. Specify the vegetables you eat, useful quantities, your availability during holidays, the budget, tools, and materials available on-site.
The RHS recommends selecting crops based on your preferences, space, and available labour, then avoiding quantities you cannot use. A goal of self-sufficiency does not replace this assessment. Neither the term “permaculture” nor a particular garden design guarantees a specific yield.
An example of a starting project: “Grow a few vegetables for meals, with easy access to water and without expanding as long as current maintenance is difficult to manage.” This is a goal to adapt, not a mandatory minimum area.
Organise crops and pathways
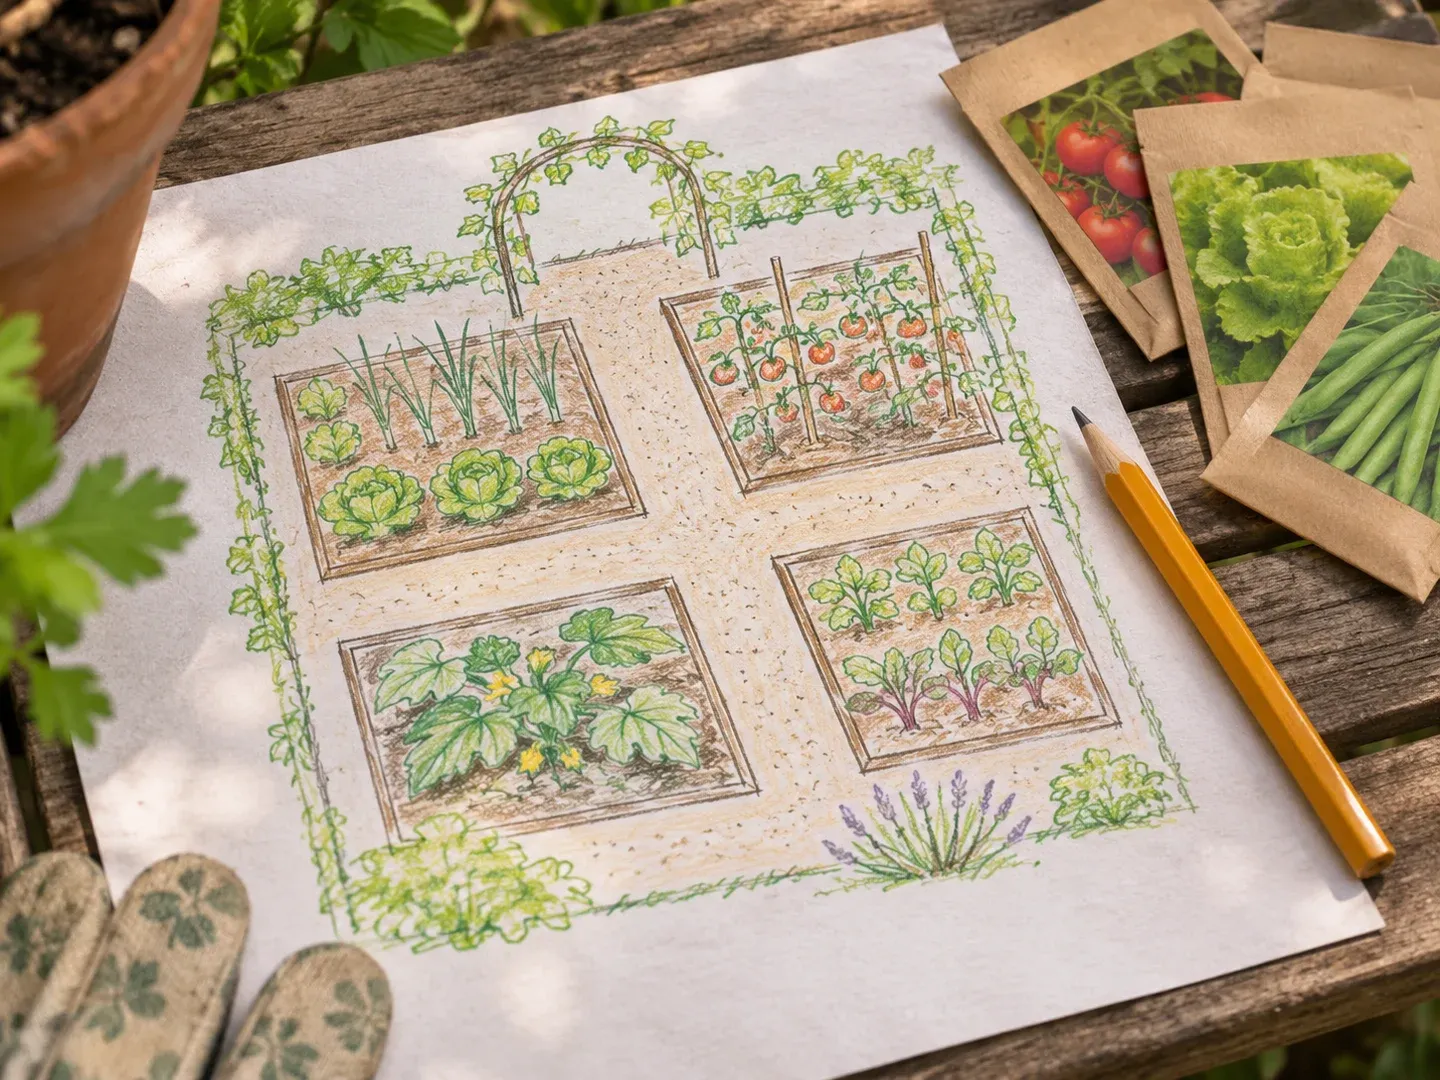
First, sketch the pathways and the trial area. Ensure you can reach the plants, carry a watering can, and harvest without walking through the crops. Account for the future height of plants so that taller ones do not shade others. These choices align with the University of Maryland’s installation advice.
Next, add the selected crops with their space requirements at maturity. A vegetable garden plan will help you draw up this layout. The RHS advises a scale drawing to avoid overcrowded planting and notes that some crops may need to be omitted.
For each addition, define its function: “This pathway allows me to water,” “This area receives crops for this season.” This will help you revise any element that complicates the work.
Choose techniques based on the problem to solve
A raised bed can improve access or growing conditions. However, it requires a structure and filling material. The RHS also notes that plants in raised beds may suffer from drought more quickly than those in open ground. Constructing one should address an identified difficulty.
Mulching covers the soil and can reduce evaporation. It does not eliminate the need for watering: water must still reach the roots, as the RHS reminds us. Select the material and timing for application with the mulching guide, then check the soil beneath the cover.
Limiting soil disturbance is an approach to plan for. The no-dig method described by the RHS uses surface organic matter applications; their availability and transport are factors in the project. On heavily compacted soil, this same source recommends light loosening with a fork without turning the soil over. A complete ban on working the soil is therefore not a rule to impose everywhere.
Worked example: a small bed before a permanent layout
Here is a fictional planning example, with no claimed harvest results. The project is to grow a few lettuces suited to the season and monitor them during regular garden visits.
- Compare two locations. Area A is near the water source and pathways; observations show suitable light and well-drained soil. Area B is free but remains damp for long periods and requires carrying a watering can across the lawn. Area A is chosen for the trial, while continuing to observe Area B. These criteria follow the Maryland site selection guidance.
- Keep the bed simple. If access to the soil is comfortable and the soil in Area A is suitable, no identified need requires building a raised bed. First, mark the edges and pathways, then allocate space for lettuces based on their type. The measured plan illustrates this transition from measurements to planting spaces; this is not a mandatory area.
- Test one adaptation. A suitable mulch may be considered once the plants are established, while continuing to monitor soil moisture and watering. If preparing a seed row, keep it clear initially: the choice of technique follows the planned task. Mulching guide
- Decide after use. If watering and reaching each plant remain easy, maintenance fits within the available time, and harvests are used, a small expansion can be considered. If carrying water or reaching the plants is already difficult, reduce or relocate the trial before purchasing a structure. A disappointing harvest also requires checking growing conditions, not just the bed’s design.
Try it and decide on the next steps
Small scale and adaptation based on feedback are part of Holmgren’s principles. For your first area, prepare a simple record:
- The need: What you wish to harvest or facilitate.
- The trial choice: Selected location, crops, and layout.
- Resources committed: Purchases, materials used, and time spent.
- Observations: Usable harvests, watering, access difficulties, or maintenance issues.
- Next decision: Maintain, modify, or reduce the trial.
Also note any information you still need to understand a problem. If the area already requires more work than anticipated, adjust it before expanding the vegetable garden.
Sources and references
- Essence of PermacultureDavid Holmgren, Holmgren Design, in English Accessed on 16 October 2026.
- How to Start a Vegetable GardenUniversity of Maryland Extension, in English Accessed on 16 October 2026.
- Planning a vegetable gardenRoyal Horticultural Society (RHS), in English Accessed on 16 October 2026.
- How to make a raised bedRoyal Horticultural Society (RHS), in English Accessed on 16 October 2026.
- No-dig gardeningRoyal Horticultural Society (RHS), in English Accessed on 16 October 2026.
- Mulches and mulchingRoyal Horticultural Society (RHS), in English Accessed on 16 October 2026.