The vegetable garden notebook / Techniques
Ollas in the Vegetable Garden: Installation, Testing, and Planning Refills
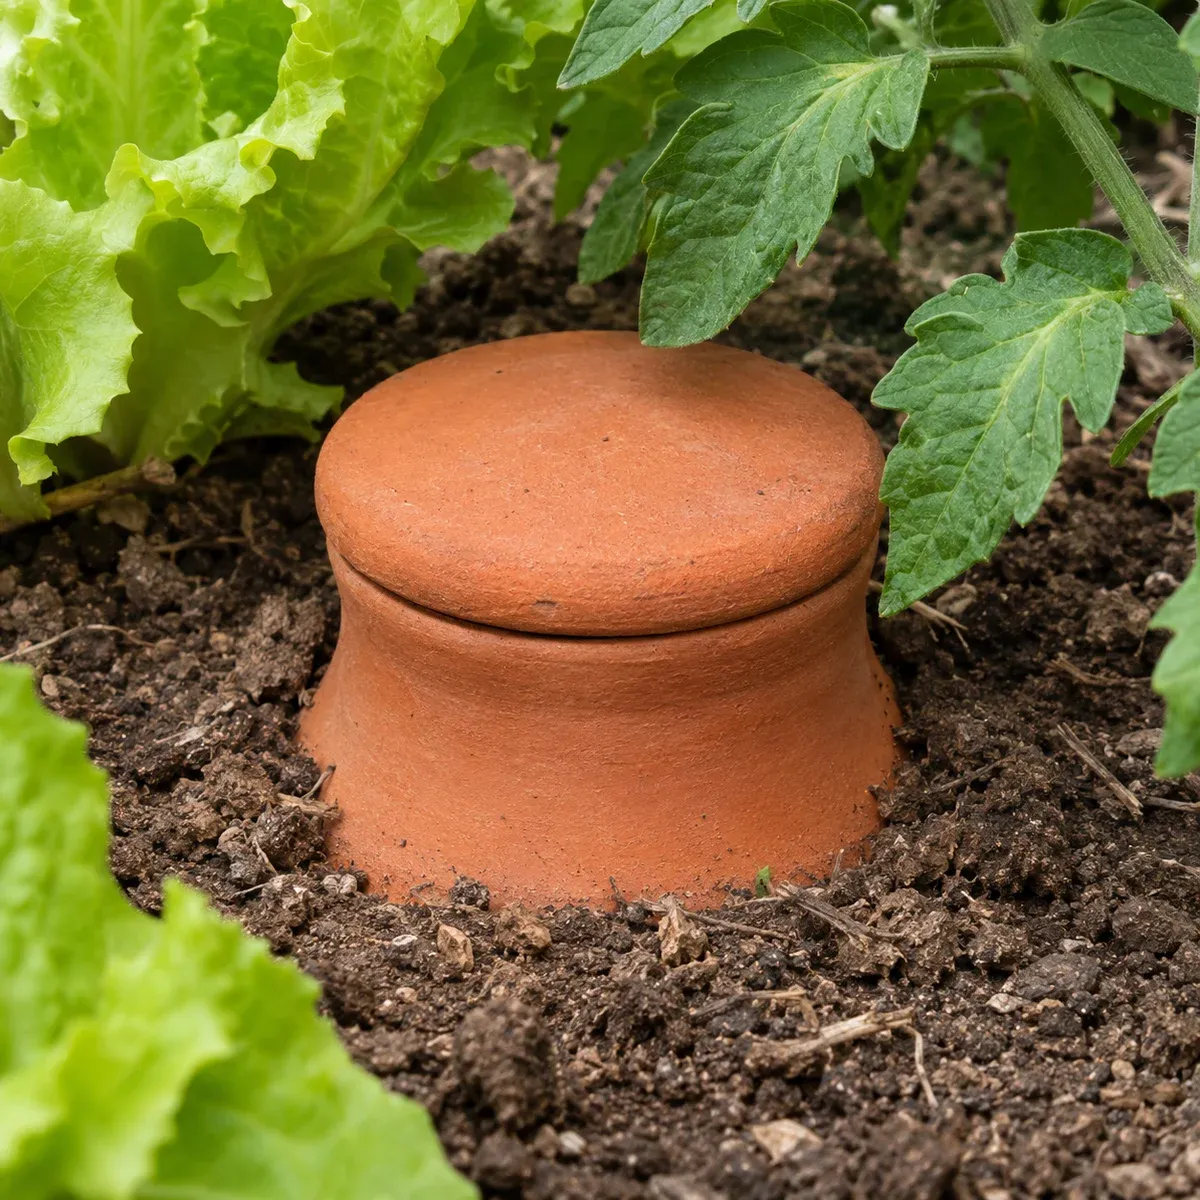
An olla is a porous terracotta reservoir buried near the roots. It releases water into the surrounding soil, but its range and refill frequency must be verified in your garden.
Adapt this guidance to your garden’s climate and conditions.
Practical steps
- Choose the Location
Plan space for the pottery, roots, and access for refilling.
- Install
Bury the porous body, leaving the opening accessible and covered.
- Test
Observe the water level and moisture around the roots before relying on the olla.
- Organise Monitoring
Adjust how often you visit and plan to remove the olla before frost.
How Does an Olla Supply Water to the Roots?
The unglazed terracotta wall allows water to pass into the surrounding soil. Soil moisture influences this transfer. The pottery supplies a nearby zone, not the entire bed: the University of Arizona notes that data on ideal spacing remains limited. No single range suits all soils and plants. Arizona
Soil matters: in observations in New Mexico, Marisa Thompson describes water moving more downwards in sandy soil and spreading more sideways in clay soil. She also warns against prolonged saturation. Check the soil around your olla to verify water diffusion. NMSU
Compare Models Before Purchase
Do not choose based solely on the advertised water capacity. Match the model to your location:
- Buried body: Note its width and height. In a planter, check the remaining space for root balls and substrate; the Arizona publication notes that the pot takes up some of the space available for growing.
- Opening and lid: Ensure you can refill, replace the lid, and remove the pottery without dismantling the planting. Access can become difficult under foliage, reports Colorado.
- Intended use: Ask for the instructions and check that the pot is intended for your container or for open ground; also read the winter storage guidance.
- Available monitoring: Plan who will check and refill the device. The reservoir’s capacity alone does not tell you how long it can go without refilling. Arizona
Choose the Location and Install Before Roots Occupy the Soil
Plan installation before planting to avoid digging into established roots. Reserve space for the olla and watering-can access: branches may later obscure the opening, as described in the Colorado account. Colorado
Bury the porous body and replace the soil so it is in contact with the pot all round, leaving the opening above ground and accessible. Fill it, then cover the opening to limit evaporation and prevent animals or debris from entering. Follow the olla’s instructions for first use. A glazed pot does not provide the same diffusion. Arizona, NMSU
Direct sowings and young plants require supplementary watering until their roots reach the moist zone. Do not let the seedbed dry out on the assumption that the olla is full. Arizona, Colorado
Test Diffusion and Monitor Refills
Record the water level, refill date, and moisture at the root location, near the olla and further away, without damaging the plants. Repeat as weather and crops change. Refill needs vary with soil, climate, and plants; salts may also clog the pores. Arizona
If the soil around the roots remains dry, water it directly, then reassess the olla’s position or the device itself. If the soil remains saturated, change the watering rather than continuing as before. This way of checking follows from the limits on water movement described by NMSU; the general irrigation guide helps assess the need.
Can You Rely on It While You Are Away?
Manual refilling requires regular checks. Arizona explicitly identifies forgetfulness and holidays as limitations: a full olla does not guarantee a set number of days without refilling. Arizona
Before you leave, test the device and show the person looking after it where the opening is, how to check the soil and how to provide the supplementary watering you have already tested. Schedule their visits based on your observations, accounting for warmer periods that may alter needs. Connecting to a reservoir also requires testing; the automatic irrigation guide explains distribution checks.
Remove and Clean Before Frost
For ollas exposed to frost, plan removal before hard frosts. The Colorado account describes emptying the pot, drying it thoroughly, brushing off debris and storing it under cover for winter. Also follow the manufacturer’s winter storage instructions; do not assume burial protects all pottery. Before using it again, check its condition and retest diffusion. Colorado
Sources and references
- Irrigating with OllasUniversity of Arizona Cooperative Extension, Amy Nickel and Andrew Brischke, in English Accessed on 18 October 2026.
- Oh, Yeah! Ollas!New Mexico State University, Marisa Y. Thompson, in English Accessed on 18 October 2026.
- Olla Pots: An Ancient Irrigation TechniqueColorado State University Extension, Pueblo County, Di Graski, in English Accessed on 18 October 2026.